
Preparing Digital Artwork for DTF Printed Apparel
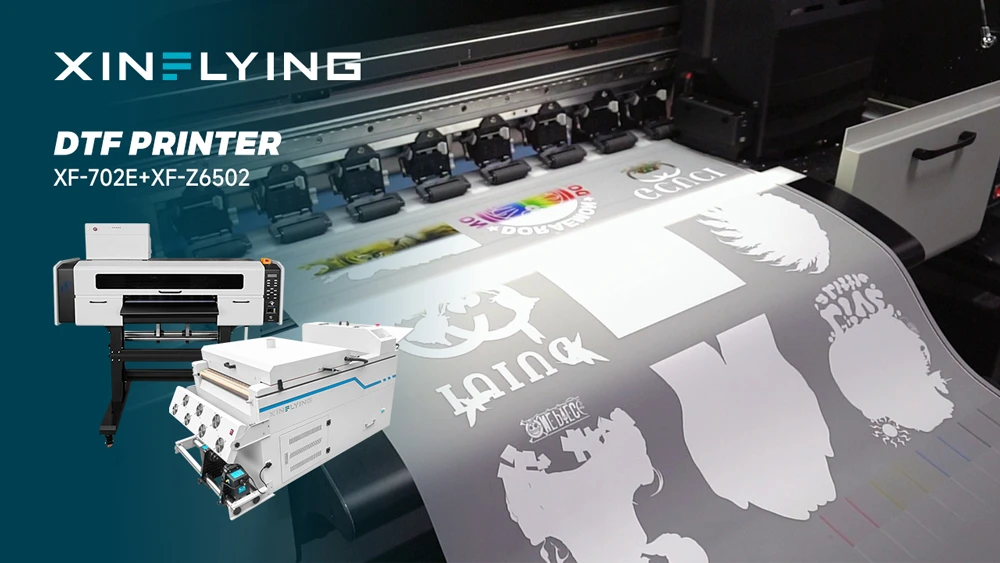 DTF printer printing on the film.
A design that looks sharp on a phone can still produce a disappointing garment print. It may have too few pixels for its intended size, a hidden background or details that are too fragile for the transfer process. Preparing artwork for direct-to-film printing means checking the file at the size and on the garment where it will actually be used.
DTF printers create color and white-ink layers on PET film. Adhesive powder is applied and cured, then the transfer is heat pressed onto a suitable garment. The artwork must support that process. A clear file specification and a physical sample prevent many problems before a full order reaches production.
Start with the garment and the print dimensions
Decide the physical width and height of the finished graphic before exporting it. A small chest logo, a back print and a sleeve design need different layouts. Measure the usable print area on the actual garment, including smaller sizes in a mixed order. Seams, pockets and zips can limit placement or interfere with pressing.
Do not assume the same print size suits every garment. A design that fits an adult sweatshirt may be too wide for a children’s T-shirt. Create separate versions where necessary and label each with its intended dimensions. A simple mock-up helps confirm placement, but a mock-up alone does not establish the file’s print size.
When buying ready-made transfers, ask the printer what measurements it uses. Some order forms accept a bounding box while others require the dimensions of the visible artwork. Agree on this before an automatic resizing tool changes the proportions or leaves unexpected margins.
Check pixels at the final output size
Raster artwork is made of pixels. Its effective resolution depends on how many pixels are spread across the printed area. Changing a resolution label from 72 to 300 pixels per inch without resampling does not create more image detail. Adobe’s explanation of image size and resampling distinguishes changing print dimensions from adding or removing pixels. Enlarging a low-resolution image can make its existing edges more obvious.
As a planning example, a 12-inch-wide image at 300 pixels per inch requires 3,600 pixels across. This is a file-sizing calculation, not a guarantee of print quality or a universal minimum. Fine lettering, photographs and textured artwork can have different requirements. Follow the printer’s specification and inspect the exported file at the actual output size.
Use the original high-quality artwork where possible. Screenshots and images saved repeatedly through messaging apps may introduce compression or lose fine edges. A vector logo can preserve clean shapes while being resized, but raster effects embedded inside a vector file still have a finite resolution.
Remove backgrounds deliberately
If the garment should show through around the design, the file needs a transparent background. A white rectangle behind a logo can be treated as artwork and printed with a white base. A checkerboard visible in an image may also be part of the image itself rather than real transparency.
Inspect the file over both light and dark temporary backgrounds. This reveals pale outlines, stray pixels and remnants left by automatic background removal. Pay particular attention to hair, soft shadows and small spaces between letters. Partially transparent edges may interact with white-ink generation in ways that differ from the screen preview.
PNG can preserve raster transparency, while JPEG cannot. PDF may be appropriate for mixed or vector artwork if the printer accepts it. File format alone does not prove that the design is ready. Confirm whether fonts need to be embedded or converted to outlines, and keep an editable original separate from the production export.
Test fine lines and isolated details
Small dots, thin strokes and tiny lettering need enough printed structure and adhesive coverage to survive handling and transfer. There is no single minimum line width that applies to every DTF system. Ink, film, powder, curing and pressing all influence the result.
Ask the producer for its tested limits, then review the design at its smallest intended size. A logo may work at full back-print size but lose features when reduced for a chest position. Delicate decorations can be thickened or simplified after a test shows which details are unreliable.
Soft gradients to transparency need particular attention. A smooth fade on screen can produce a visible white edge or a different transition if the RIP’s white layer is not prepared appropriately. Discuss these effects with the operator rather than applying a universal white-ink setting to every file.
Let one workflow control color and white ink
Keep the document’s color profile and export settings consistent with the printer’s instructions. Do not convert every file to CMYK simply because it will be printed. Some RIP workflows accept profiled RGB artwork and perform the output conversion. Others require a different preparation method.
The white underbase is normally handled through the DTF production workflow. Unless the printer requests a separate white channel, do not create one arbitrarily. Ask how the operator manages white coverage, semi-transparent pixels and edge adjustment. These decisions affect the appearance on dark garments.
For example, PrintFactory’s DTF profiling documentation describes white-generation and choke controls for adjusting the white layer near artwork edges. These controls belong to that software’s production workflow; they are not universal requirements for the file a customer submits.
When a business brings production in house, artwork preparation must be matched to its RIP and equipment. XINFLYING supplies commercial digital printing equipment and related consumables. Its DTF printing systems are one example to evaluate alongside software, compatible consumables and training. Request a test with your own difficult artwork rather than relying only on a supplier’s demonstration image.
Build a gang sheet with handling in mind
A gang sheet combines multiple transfers in one film layout. This can use space efficiently, but leaving too little room between designs makes cutting and handling harder. Follow the producer’s required spacing, sheet dimensions and usable margins. Keep each design at its approved size when arranging it.
Group copies clearly and check quantities against the order. Do not add decorative backgrounds or registration marks unless the production team requests them. Distinguish an intentional duplicate from an accidental copy, especially when names and numbers differ by only one character.
Confirm where mirroring occurs. The artwork must have the correct orientation for the finished transfer, but many production workflows apply the mirror step in the RIP. Mirroring the supplied file and then mirroring it again can reverse the intended preparation. Follow the operator’s submission instructions and check readable text on the physical sample.
Approve a sample on the intended fabric
Screen previews cannot confirm adhesion, hand feel or wash performance. Produce a sample on the garment and color planned for the order. Check the print’s dimensions, position, edges, legibility and color after the full pressing and finishing process.
For repeat or commercial orders, agree on a testing method appropriate to the intended use. Record the film, ink, powder, curing and press settings. Do not treat one successful sample as proof that the same transfer works on every coated, stretch or heat-sensitive fabric.
If the sample fails, identify the stage responsible before altering the artwork. A damaged nozzle, curing problem or unsuitable press setting cannot always be corrected by sharpening an image. Conversely, a well-maintained printer cannot recover detail that the file never contained.
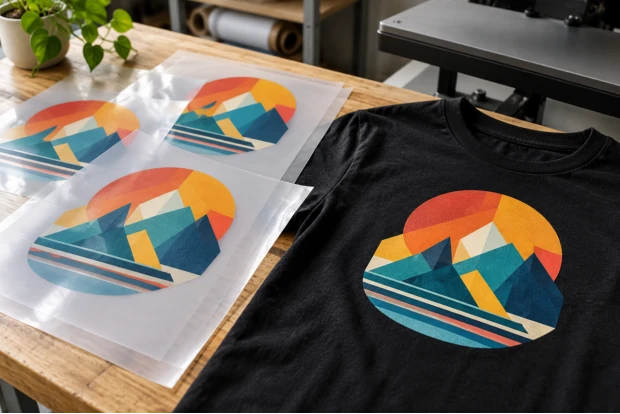
Approve the artwork on the garment and color intended for the order.
Save a production version that can be repeated
Keep the approved source, exported file, dimensions, garment reference and sample record together. Use meaningful revision names and remove outdated exports from the submission folder. This prevents a corrected design from being replaced accidentally by an earlier copy.
Before sending the order, check the production export against the producer’s file specification:
· Confirm the physical width, height and garment-size version.
· Inspect original pixels and embedded raster effects at the final print size.
· Check transparency over both light and dark backgrounds, including small internal gaps.
· Verify the accepted file format and whether fonts must be embedded or outlined.
· Preserve the requested color profile and confirm who prepares the white layer.
· Compare fine details with tested production limits rather than a generic minimum.
· Check copy quantities, cutting space and the agreed mirroring stage.
· Include the approved garment sample reference and the correct file revision.
This review gives the production team a clearer starting point and makes future reorders easier to reproduce.
